
MAA 230
The US Army 1890–1920
Between 1890 and 1920 the US Army underwent profound changes in organization, function, composition and appearance. The Army was transformed from a small, blue-clad force whose primary weapon was the single-shot rifle, into a mighty host of men dressed in dirt-coloured combat uniforms, using automatic weapons, tanks and aircraft to fight enemies on fields across the world. This book details the Army’s developments during its involvement in the Spanish-American War, the Boxer Rebellion and World War I. Particular attention is given to the evolution of the Army’s uniforms, which are illustrated vividly throughout the book.
Author: PHILIP KATCHER
ISBN: 0-85045-176-0
Sale!
![The US Army 1890-1920 [MAA82]](https://militaria.co.uk/wp-content/uploads/1970/01/82-us-army1890-1920.jpg)
Men at Arms (MAA)
The US Army 1890-1920 [MAA82]
Original price was: £8.99.£5.95Current price is: £5.95.
Availability: Only 1 left in stock
| Weight | 0.25 kg |
|---|
Related products
-
Sale!
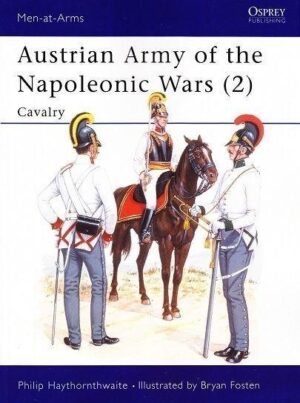
Austrian Army of the Napoleonic Wars (2): Cavalry [MAA181]
Original price was: £9.99.£5.95Current price is: £5.95. Add to basket -
Sale!
![The Israeli Army in the Middle East Wars 1948-73 [MAA127]](https://militaria.co.uk/wp-content/uploads/1970/01/127-israeli-army-middle-east-wars-1948-73.jpg)
The Israeli Army in the Middle East Wars 1948-73 [MAA127]
Original price was: £8.99.£5.95Current price is: £5.95. Add to basket -
Sale!
![Armies of the Vietnam War (2) [MAA143]](https://militaria.co.uk/wp-content/uploads/1970/01/143-armies-of-the-vietnam-war-2.jpg)
Armies of the Vietnam War (2) [MAA143]
Original price was: £8.99.£5.95Current price is: £5.95. Add to basket -
Sale!
![Napoleon's Dragoons and Lancers [MAA55]](https://militaria.co.uk/wp-content/uploads/1970/01/55-Napoleons-Dragoons-and-Lancers.jpg)
Napoleon’s Dragoons and Lancers [MAA55]
Original price was: £8.99.£5.95Current price is: £5.95. Add to basket -
Sale!
![The Korean War 1950-53 [MAA174]](https://militaria.co.uk/wp-content/uploads/1970/01/maa174-300x404.jpg)
The Korean War 1950-53 [MAA174]
Original price was: £8.99.£5.95Current price is: £5.95. Add to basket -
Sale!
![Flags of the Napoleonic Wars (1) [MAA77]](https://militaria.co.uk/wp-content/uploads/1970/01/77-Flags-Napoleonic-Wars-01.jpg)
Flags of the Napoleonic Wars (1) [MAA77]
Original price was: £8.99.£5.95Current price is: £5.95. Add to basket -
Sale!
![The Mexican-American War 1846-48 [MAA56]](https://militaria.co.uk/wp-content/uploads/1970/01/56-mexican-american-war.jpg)
The Mexican-American War 1846-48 [MAA56]
Original price was: £8.99.£5.95Current price is: £5.95. Add to basket -
Sale!

Armies of the Crusades [MAA75]
Original price was: £8.99.£5.95Current price is: £5.95. Add to basket