- Introduction
- Background and Causes
- The Zulu Kingdom and Its Military System
- British Forces and Strategy
- Isandlwana: 22 January 1879
- Rorke’s Drift: 22–23 January 1879
- The Turning of the Tide
- Hlobane and Kambula
- Ulundi: 4 July 1879
- Key Personalities
- King Cetshwayo kaMpande (c. 1826–1884)
- Lieutenant General Lord Chelmsford (1827–1905)
- Lieutenant John Chard VC, RE (1847–1897)
- Surgeon Major James Henry Reynolds VC (1844–1932)
- Legacy and Commemoration
- Collector’s Corner: Zulu War Militaria
- Sources
- Introduction
- Background and Causes
- The Zulu Kingdom and Its Military System
- British Forces and Strategy
- Isandlwana: 22 January 1879
- Rorke’s Drift: 22–23 January 1879
- The Turning of the Tide
- Hlobane and Kambula
- Ulundi: 4 July 1879
- Key Personalities
- Legacy and Commemoration
- Collector’s Corner: Zulu War Militaria
- Sources
Introduction
The Anglo-Zulu War of 1879 was one of Victorian Britain’s most dramatic colonial campaigns — a brief, savage conflict fought in perhaps six months that produced two of the most famous engagements in British military history: the catastrophic defeat at Isandlwana and the heroic defence of Rorke’s Drift. The war pitted the disciplined firepower of the world’s leading industrial power against the tactical brilliance and fighting spirit of the last great independent African military state. [1]
Though short, the Zulu War had lasting consequences. It ended the independence of the Zulu nation, shattered Cetshwayo’s kingdom, and — together with the concurrent First Boer War — reshaped British strategic thinking about southern Africa. For collectors and historians alike, the campaign exercises an enduring fascination: it is the finest example of a “small war” that, through the sheer scale of British losses, became a national crisis and a defining story of Victorian military culture.
Background and Causes
The war’s origins lie in the strategic ambitions of Sir Henry Bartle Frere, the British High Commissioner for Southern Africa. Frere envisioned a Confederation of all southern African territories under British control — a plan modelled on the Canadian federation of 1867. The independent and powerful Zulu kingdom, with its standing army of perhaps 40,000 warriors, was seen as the principal obstacle to this scheme. [2]
Anglo-Zulu relations had been broadly cooperative for decades. The Zulu had allied with Britain against the Boers in the 1830s and had largely coexisted peacefully with their colonial neighbours in Natal. But by the late 1870s, the confluence of Confederation politics, border disputes in the “disputed territory” between Natal and Zululand, and Frere’s personal determination to break Zulu military power made confrontation increasingly likely. [1]
On 11 December 1878, Frere issued an ultimatum to King Cetshwayo that he knew was unacceptable: the Zulu king was to disband his military system — the amabutho (age-grade regiments) — within thirty days. The amabutho were not merely an army; they were the social, political, and economic foundation of the Zulu state. Disbanding them was effectively a demand for national suicide. When the deadline passed unanswered on 11 January 1879, Lord Chelmsford’s forces crossed the Buffalo River into Zululand. [2]
The Zulu Kingdom and Its Military System
The Zulu military system, built by Shaka kaSenzangakhona in the 1810s–20s and refined by his successors, was one of the most effective pre-industrial military organisations in world history. At its heart was the amabutho system: every young man was enrolled into an age-grade regiment and barracked together in amakhanda (military homesteads) under the king’s direct control. They could not marry until the king gave permission — providing a powerful incentive for military service and loyalty. [3]
Zulu tactics were built around the “beast’s horns” (impondo zankomo) formation: a central “chest” (isifuba) engaged the enemy frontally, while two “horns” swung out to encircle the flanks. A reserve, the “loins” (umuva), sat with their backs to the battle and committed at the decisive moment. The system demanded exceptional fitness, discipline, and coordination — all of which the Zulu possessed in abundance. Warriors were drilled from youth and proved capable of covering 50 miles in a day on foot. [3]
By 1879, the main Zulu weapon remained the iklwa — the short stabbing spear — supplemented by throwing spears and knobkerries. Many warriors also carried firearms, often obsolete muskets and rifles acquired through trade. However, the Zulu had no tradition of marksmanship, little ammunition, and no means of maintaining their weapons. Their musketry was generally poor — high, erratic volleys that frequently passed over the heads of their targets. The close-quarters charge with the stabbing spear remained the decisive Zulu tactic throughout the war. [1]
King Cetshwayo kaMpande, who had ascended the throne in 1873, commanded an army estimated at between 35,000 and 40,000 men organised into approximately 33 amabutho. Many of these regiments contained veterans of the 1856 civil war and the 1838–40 campaigns against the Boers. They were experienced, motivated, and led by seasoned izinduna (commanders). The British would discover that this was no rabble to be scattered by a few volleys. [3]
British Forces and Strategy
Lieutenant General Lord Chelmsford assembled approximately 16,800 men — a mix of British regular infantry (principally the 1/24th and 2/24th Foot, plus the 80th, 90th, and 99th Regiments), colonial mounted volunteers, the Natal Native Contingent (NNC), and Royal Artillery batteries. The regulars were professional soldiers armed with the Martini-Henry single-shot breech-loading rifle — a devastating weapon in disciplined hands, capable of accurate fire at 400 yards and massed volley fire at considerably greater range. [1]
Chelmsford divided his force into five columns. Three were offensive: the main No. 3 Column (Centre), commanded by Colonel Richard Glyn but effectively led by Chelmsford himself; No. 1 Column (Right Flank) under Colonel Charles Pearson; and No. 4 Column (Left Flank) under Colonel Evelyn Wood. Two further columns guarded the border. The plan was a converging advance on the Zulu capital at Ulundi — a strategy that dispersed British strength across a wide front and left individual columns vulnerable. [2]
Isandlwana: 22 January 1879
The disaster at Isandlwana was the worst defeat inflicted on the British Army by an indigenous force in the 19th century — and arguably one of the most traumatic in the entire history of the British military. On the morning of 22 January, Chelmsford divided his Centre Column, taking roughly half the force forward to locate what he believed was the main Zulu army. He left the camp at the foot of the distinctive sphinx-shaped hill of Isandlwana with approximately 1,700 men — six companies of the 1/24th and 2/24th Foot, two guns of N Battery 5th Brigade RA, and several hundred NNC troops — under the command of Brevet Lieutenant Colonel Henry Pulleine. [1]
At around 11:00, a mounted patrol from the camp stumbled upon the main Zulu army — some 20,000 warriors — sitting silently in a ravine to the north-east. The Zulu had not intended to attack that day (it was the day of the new moon, considered inauspicious), but once discovered they surged forward spontaneously. The “beast’s horns” formation deployed with terrifying speed across the plain. [2]
What followed was a desperate two-hour battle. The British infantry, extended in a firing line some distance from the camp, poured devastating volley fire into the advancing Zulu — but the line was too long, too thin, and too far forward. The NNC companies broke, opening gaps in the line. The right horn swept around the flank. Ammunition resupply, hampered by the distance between the firing line and the wagons, may — controversially — have faltered at the critical moment. [1]
Once the Zulu closed to hand-to-hand range, the result was inevitable. The camp was overrun. Nearly 1,300 British and colonial troops were killed, including virtually every man of the six companies of the 24th Foot. It was a catastrophe — the single bloodiest day in British military history between Waterloo and the Somme. Back in Britain, the news caused national shock on a scale not seen since the Charge of the Light Brigade. [2]
The debate over ammunition supply — whether quartermasters refused to issue rounds to companies other than their own, or whether screws on ammunition boxes could not be opened quickly enough — has continued for nearly 150 years and remains one of the most contested questions in Zulu War historiography. Modern research by Ian Knight and others suggests that the ammunition controversy has been overstated, and that the fundamental cause of the defeat was the overextension and insufficient fortification of the camp. [3]
Rorke’s Drift: 22–23 January 1879
The defence of Rorke’s Drift on the night of 22–23 January 1879 is one of the most celebrated actions in British military history. The small mission station and supply depot at the Buffalo River crossing was held by approximately 150 men — predominantly B Company, 2/24th (2nd Warwickshire) Regiment of Foot — under Lieutenants John Chard RE and Gonville Bromhead. They were attacked by some 3,000–4,000 warriors of the Zulu reserve, principally the uThulwana, iNdlondlo, and uDloko amabutho. [1]
The garrison constructed hasty defences from mealie bags and biscuit boxes. The fighting lasted approximately twelve hours — from late afternoon on the 22nd through the early hours of the 23rd — involving repeated Zulu assaults, the evacuation of the hospital building (which caught fire), several desperate hand-to-hand melees, and a final withdrawal to a tight inner perimeter around the storehouse. [2]
By dawn, the Zulu withdrew. The garrison had lost 17 killed and 15 wounded. Zulu losses were estimated at 350–500 killed around the post, with many more dying of wounds in the following days. Eleven Victoria Crosses were awarded — the most ever for a single action — although some historians have argued that the awards were partly motivated by the need to provide a morale-boosting counterpoint to the Isandlwana disaster. [3]
Regardless of the politics of the awards, the defence remains a remarkable feat of arms. The garrison held against odds of roughly 25:1, fought with extraordinary steadiness, and demonstrated the devastating effectiveness of the Martini-Henry rifle when fired from behind cover by disciplined troops.
The Turning of the Tide
Isandlwana caused panic in Natal and Chelmsford was forced onto the defensive while reinforcements were shipped from Britain. The Right Flank column, besieged at Eshowe, was eventually relieved at the Battle of Gingindlovu (2 April 1879) — a model defensive action where the British formed a laager and repulsed massed Zulu attacks with devastating firepower, inflicting over 1,000 casualties for the loss of just 11 killed. The lesson was unmistakable: when properly entrenched and concentrated, British firepower was irresistible. [1]
Chelmsford received massive reinforcements — including several additional infantry battalions, cavalry, artillery, and the famous 17th Lancers. By June 1879 he was ready to resume the advance on Ulundi with a reconstituted and vastly more powerful force.
Hlobane and Kambula
In the north, Colonel Evelyn Wood’s No. 4 Column fought two sharply contrasted engagements on consecutive days. On 28 March, a mounted assault on the flat-topped mountain of Hlobane was caught by the arrival of a massive Zulu army. The retreat from the mountain was a chaotic scramble down nearly vertical cliffs — Wood lost about 100 men and the engagement was a clear Zulu victory. [2]
The following day, the same Zulu army — estimated at 20,000 men — attacked Wood’s fortified camp at Kambula. This time, entrenched behind wagons and earthworks, the British fought a model defensive battle. The Zulu attacked in waves for over four hours before being decisively repulsed by concentrated rifle and artillery fire. The mounted pursuit was devastating — Zulu losses are estimated at 2,000 killed. Kambula was the true turning point of the war: it broke the offensive capability of the northern Zulu forces and demonstrated that the tactical lessons of Isandlwana had been absorbed. [3]
Ulundi: 4 July 1879
The final battle of the war was fought on the Mahlabathini plain within sight of the great royal homestead at Ulundi. Chelmsford advanced with about 5,300 men formed in a hollow square — infantry on all four sides, cavalry and artillery in the centre. The Zulu attacked with perhaps 15,000–20,000 warriors in their traditional encircling formation. [1]
The result was never truly in doubt. The Martini-Henry volleys, the devastating fire of Gatling guns and artillery, and the disciplined steadiness of the infantry shattered every attack within minutes. When the 17th Lancers were released to pursue, the Zulu army was effectively destroyed as a fighting force. British losses were 13 killed and 78 wounded. Zulu dead were estimated at over 1,500. Chelmsford burned Ulundi and retired — the war was effectively over. [2]
Cetshwayo was hunted down and captured in August. He was exiled to Cape Town and later to London, where he was received by Queen Victoria. The Zulu kingdom was broken into thirteen chieftainships under a British Resident — a settlement that generated further conflict and instability for years to come. [3]
Key Personalities
King Cetshwayo kaMpande (c. 1826–1884)
The last independent Zulu king. An astute political leader who sought to avoid war with Britain but refused to dismantle the military system that was the foundation of Zulu sovereignty. He was betrayed by Frere’s determination to engineer a confrontation.
Lieutenant General Lord Chelmsford (1827–1905)
The British commander. His decision to split his force at Isandlwana, his failure to laager the camp, and his underestimation of the Zulu army led directly to the disaster. He redeemed his reputation at Ulundi, but the controversy shadowed the rest of his career. He never held another field command.
Lieutenant John Chard VC, RE (1847–1897)
A Royal Engineers officer who found himself in command at Rorke’s Drift by virtue of seniority. His calm leadership during the defence earned him the Victoria Cross and a personal interview with Queen Victoria. He died of cancer aged just 50.
Surgeon Major James Henry Reynolds VC (1844–1932)
The medical officer at Rorke’s Drift who tended the wounded under fire throughout the battle, repeatedly exposing himself to retrieve patients from the burning hospital. His VC citation noted his “constant attention to the wounded under fire.”
Legacy and Commemoration
The Zulu War has left a powerful legacy in both British and South African culture. In Britain, Isandlwana and Rorke’s Drift entered the national mythology — retold in paintings (Alphonse de Neuville’s famous depiction of Rorke’s Drift hangs in the officers’ mess of the Royal Engineers), poetry, and eventually film. The 1964 film Zulu, starring Stanley Baker and Michael Caine, remains one of the most iconic British war films. [4]
In South Africa, the battlefields are now carefully preserved heritage sites. The white cairns at Isandlwana — each marking a cluster of British dead — and the modest stone buildings at Rorke’s Drift are among the most poignant and atmospheric military sites in the world. The Isandlwana Heritage Centre and the Rorke’s Drift Museum tell the story from both perspectives — a welcome evolution from the solely British viewpoint that long dominated the historiography. [4]
For the Zulu people, the war marked the end of their kingdom’s independence but not the end of their identity. The Zulu military tradition — its discipline, its courage, its tactical brilliance — is remembered with pride. The victory at Isandlwana, in particular, holds a place of honour as a demonstration that African forces could defeat European armies in open battle.
Collector’s Corner: Zulu War Militaria
Zulu War material is among the most highly prized of all Victorian militaria — rare, evocative, and intensely sought after:
- Medals — the South Africa Medal 1877–79 with “1879” clasp is the Zulu War campaign medal. Groups named to men of the 24th Foot, especially those present at Isandlwana or Rorke’s Drift, are extraordinarily valuable. A VC group to a Rorke’s Drift defender would fetch six figures at auction. Even unnamed medals to other regiments command substantial premiums due to the campaign’s fame.
- Weapons — Zulu assegais (both iklwa stabbing spears and isijula throwing spears), knobkerries, and shields occasionally appear at auction. Authentication can be challenging — many “Zulu War” weapons were in fact collected during the 1906 Bambatha Rebellion or later. Provenance is key.
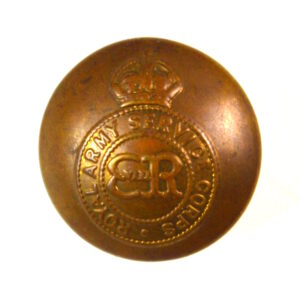
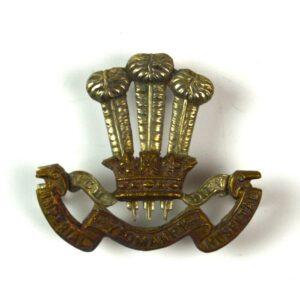
- Buttons and badges — items of the 24th Foot (later South Wales Borderers), the 17th Lancers, and colonial volunteer units are highly sought. Helmet plates of the period are rare and expensive.
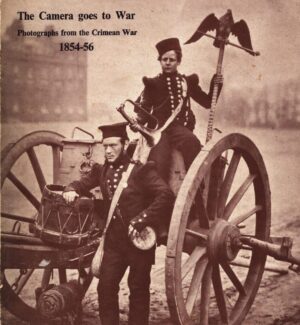
- Photographs and ephemera — original carte-de-visite photographs of officers and soldiers who served in the campaign, especially of VC recipients, are premium items. Contemporary illustrated newspapers (the Graphic, the Illustrated London News) with Zulu War coverage are more accessible entry points.
- Books — first editions of participant accounts command high prices. Bertram Mitford’s Through the Zulu Country (1883) and Norris-Newman’s In Zululand with the British (1880) are particularly valued.
Sources
- Knight, Ian. Zulu Rising: The Epic Story of Isandlwana and Rorke’s Drift. London: Macmillan, 2010. ISBN 978-1-4050-9140-1.
- Morris, Donald R. The Washing of the Spears: The Rise and Fall of the Zulu Nation. New York: Simon & Schuster, 1965. ISBN 978-0-306-81140-3.
- Laband, John. The Zulu War 1879. Oxford: Osprey Publishing, 2009. ISBN 978-1-84603-411-9.
- Greaves, Adrian. Rorke’s Drift. London: Cassell, 2002. ISBN 978-0-304-36641-7.
Frequently Asked Questions
What caused the Zulu War?
The Anglo-Zulu War of 1879 was triggered by the British High Commissioner Sir Bartle Frere's ultimatum to King Cetshwayo, demanding the disbandment of the Zulu military system. When the ultimatum expired on 11 January 1879, British forces under Lord Chelmsford invaded Zululand. The underlying cause was British imperial ambition to federate Southern Africa under the Crown.
What happened at Rorke's Drift?
The Battle of Rorke's Drift on 22-23 January 1879 saw approximately 150 British soldiers defend a mission station against 3,000-4,000 Zulu warriors for over 12 hours. Eleven Victoria Crosses were awarded — more than for any other single engagement in British history. The defence, led by Lieutenants Chard and Bromhead, became one of the most celebrated actions in British military history.
What happened at Isandlwana?
The Battle of Isandlwana on 22 January 1879 was the worst defeat suffered by the British Army at the hands of a technologically inferior indigenous force. Approximately 1,300 British and colonial troops were killed when a Zulu impi of 20,000 warriors overran their camp. The disaster shook Victorian Britain and led to massive reinforcements being sent to Zululand.
What Zulu War items can you collect?
Collectible Zulu War items include the South Africa Medal 1877-79 with '1879' clasp (named to individual soldiers), regimental badges and buttons, period photographs, contemporary newspapers, Zulu weapons (iklwa stabbing spears, knobkerries, and cowhide shields), and personal effects. Items with connections to Isandlwana or Rorke's Drift are exceptionally rare and valuable.

Related Items in Our Collection8 items